How to Fix Various Problems in Candle-Making
As we have promised you in our previous article “How do they do candles?” we have prepared a guide on dealing with different challenges you may face while candle-making. The art of creating soy wax candles requires a lot of practice, high-qualities materials, and knowing several tricks that will help you deal with such a capricious skill. Even such trifles as the temperature of the surface on which the candles dry, or the speed of pouring, are of great importance for the final result. So, let’s take a look at the most popular issues:

Soot and Smoke
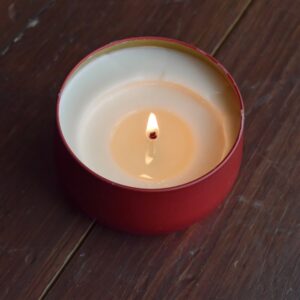
During candle burning sometimes you can notice a small amount of smoke coming from the flame.
It is ok. Anything that burns will emit smoke, but a well-made candle should not smoke and smoke.
If you notice a strong smoke from the flame, this indicates that the manufacturing process was destroyed or low-quality materials were used.
✔️ Check the size of the wick
A large amount of soot may indicate an incorrectly selected wick size. If you see heavy smoke from the flame or soot accumulating on the walls of your container, you need to reduce the size of the wick. Also, make sure you are using the right wick for your wax.
✔️ Reduce the load on the fragrance
If too much fragrance is added to the wax, then during the burning, the part of it that could not connect with the wax will burn, forming a heavy black smoke. We recommend not to add more than 10% of the fragrance to the wax, even if the technical documentation allows loading up to 12%.
✔️ Change the series of wicks
If none of the recommendations worked, try changing the series of wicks.
Small pool
A small pool of wax may mean that you have not allowed the top coat of wax to completely melt. As a result, the next time the candle is lit, you will have a tunnel formed. Also, the reason may be the wrong size of the wick.
✔️ Increase the size of your wick
A small pool forms when the candle does not generate enough heat when it burns. This will also affect the degree of flavor release. In this case, we advise you to try a larger wick.
✔️ Don’t cut the wick too short
A wick that is too short will also not generate enough heat. Make sure your wick is cut at least 5-6mm.
✔️ Be patient
It takes about 1 hour to create a full-fledged pool for every 3 cm of your candle’s diameter. For example, a container with a diameter of 6 cm will require about two hours of burning.
Frosting
The frosting is a by-product of natural wax and is a small crystal on the surface of the wax. Any wax can crystallize over time.

✔️ Stir the wax slowly
Too active stirring triggers a faster crystallization process, which is responsible for frosting.
✔️ Preheat the glass container
Warming up will reduce or eliminate the possible crystallization of your candle.
✔️ Try to pour at a lower temperature
Reducing the pouring temperature can help avoid the formation of crystals when cooling the candle. Initial temperature correction in increments of +/- 95°F (35°С).
✔️ Observe the cooling temperature
Remember that candles should cool down in a room with a temperature of 70-77 °F without drafts. We recommend cooling the candles on the grill to avoid direct contact with the surface and at the same time speed up cooling.
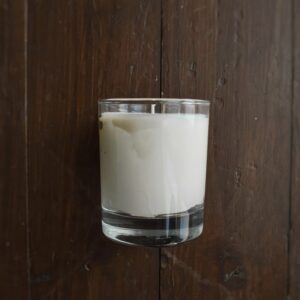
Wet Spots
This is the most common adhesion problem in container candles.
Wet spots are the places where the wax sticks away from the container as it cools, forming such cavities.
This happens when the candle cools unevenly – faster in some places and slower in others. Thus, somewhere the wax sticks to the glass, and somewhere it lags.
✔️ Thoroughly clean and warm up the container
We recommend washing all the containers with a sponge and soap before filling, and then thoroughly drying them and warming them up. This will help the wax to cool down more slowly and stick to the walls better.
✔️ Pour the wax slowly
This way you will avoid getting air that will interfere with the uniform cooling of the candle. After pouring, you can also lightly tap on the walls to release excess air.
✔️ Cool the candles at a distance
Your candles should cool down at a sufficient distance from each other – at least 10 cm. And also do not forget to cool the candles on the grille, so as not to touch the cold surface.
Tunneling
Tunneling occurs if the wick burns the wax too quickly during the burn. A small puddle appears around the wick, which burns too quickly, and the wax does not melt near the walls and remains solid. A tunnel can form if you have chosen the wrong size of the wick.
✔️ Increase the size of your wick
If the wick is too small, it will not be enough to melt enough wax and create a good pool. In this case, try using a larger wick.
✔️ Reduce the size of your wick
If the wick is too big, it burns too much wax and forms too deep a puddle around the wick. Also, the wick can emit soot. Try a smaller wick.
Peeling of wax from the wick
During solidification, the wax changes its aggregate state, as a result of which it contracts. Therefore, the wax can lag behind the wick and form a hole.
In addition, the wax sags in those places where the bubbles formed voids.
✔️ Tap the container lightly
This way you help the bubbles come out faster.
✔️ Cool on the grille
Avoid direct contact of the bottom of the container with the surface, especially with granite or marble – such surfaces absorb heat too much, and the candle cools down faster than necessary.
✔️ Change the filling temperature
Try changing the temperature in 41 °F increments up or down. The correct filling temperature will allow the candle to cool evenly and will help prevent this defect.
✔️ Use additional wax
You can melt the top layer with a construction hair dryer (slowly and carefully) or add an additional layer of wax. In both cases, the cracks must be pierced to make sure that all the voids are filled with molten wax.
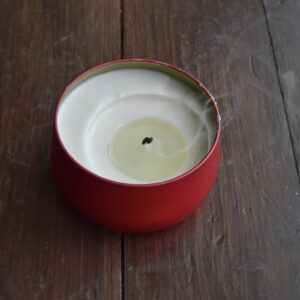
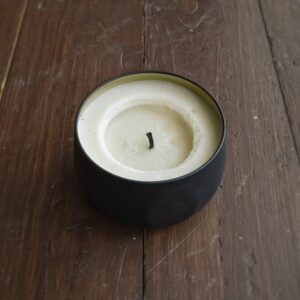
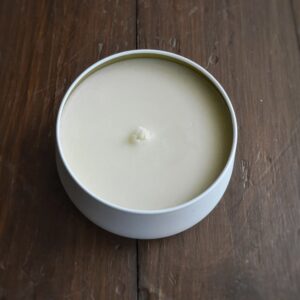
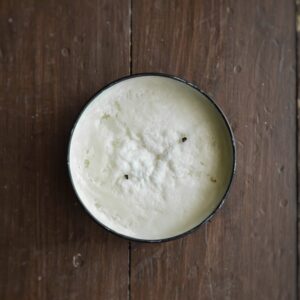
The surface of the candle is loose
A loose surface after the candle has solidified means that you have used natural wax. When solidifying, natural wax forms crystals, and if they are small and neat, then as a result we get a smooth and creamy surface.
But if the candle cools down too quickly or slowly or contains small air bubbles, pits form on the surface, which makes the candle not so beautiful.
✔️ Mix the wax slowly
Active mixing promotes the penetration of air, which, when solidified, will create such defects. If you notice bubbles, tap the container lightly on the surface immediately after filling to release excess air.
✔️ Change the filling temperature
It may take some time to find the right filling temperature for your work area. Start adjusting the temperature in increments of 41 °F up or down. The correct filling temperature will allow the candle to cool evenly and avoid the formation of large crystals.
✔️ Use additional wax
To correct the surface of the candle, you can use an additional layer of melted wax.
✔️ Warm up the surface
Instead of an additional layer, you can melt the surface of the candle with a construction hair dryer. Do it slowly and carefully.
Uneven candle surface
The uneven surface is a common phenomenon when working with soy wax. If the cooling is too fast or too slow, as well as when the wax contains small air bubbles, the surface of the wax will be uneven or loose.
To prevent this problem, also try to adjust the pouring temperature to +/- 95°F (35°С).
Small defects are easy to fix with a construction hair dryer or before pouring wax.
✔️ Mix the wax slowly
We recommend avoiding intensive mixing of the wax. If you notice bubbles, gently tap on the container immediately after filling.
✔️ Change pour temperature
Try to adjust the pouring temperature to +/- 95°F (35°С) – applicable for Wax’N’Fire 041
✔️ Use additional wax
To correct the surface of the candle, you can use an additional layer of melted wax.
✔️ Warm up the surface
Gently melt the surface of the candle with a construction hair dryer.